
OAuth : App development working with Microsoft Entra ID (Azure AD)
- Build Standard Web or Native Application
- Build JavaScript Application
- Build Backend Application (Daemon app, Service app)
- How to Verify Token
- Build Your Custom API Application
- Workload Identity Federation
In my previous post, I’ve explained about basic OAuth flow using Microsoft Identity Platform endpoint (formerly, Azure AD v2.0 endpoint). However, unfortunately we cannot use the same flow in Web front-end application, such as AngularJS or React.
For instance, front-end JavaScript code cannot invoke HTTP POST against Entra ID (Microsoft Identity Platform), then we cannot get access token or refresh token. (Identity platform is secure and cannot accept cross-origin request ! See my early post for considerations about JavaScript cross-domain invocation.)
In this post, I show you how you build front-end application with OAuth. (Here, we build a plain JavaScript application without any SDK or libraries.)
This flow is called OAuth implicit grant flow.
In App Registration
As I mentioned in my previous post “Walkthrough for OAuth flow in Entra ID“, you should register an application in Azure Portal.
In redirect URI configuration, you should enable implicit grant (turn on check boxes) as the following screenshot.
If you skip this configuration, you will encounter the error (unsupported_response_type) in the flow.

HTTP Flow and Programming – Basic
Now let’s see how OAuth implicit grant works.
First, your application should go to the following URL using Web browser (user agent). (See my previous post for parameters, such as client_id, scope, and so on.)
Remember that we specified response_type=code in my previous post (code grant flow). However, here (implicit grant flow) we set response_type=token .
https://login.microsoftonline.com/common/oauth2/v2.0/authorize?response_type=token&client_id=2f4e4a32-e473-4925-9d89-534119ec8e9f&redirect_uri=https%3A%2F%2Ftestsite.com%2Ftestapp01&scope=https%3A%2F%2Fgraph.microsoft.com%2Fmail.readAs I explained in my previous post, the following login UI (Sign-In UI) is displayed in your web browser.
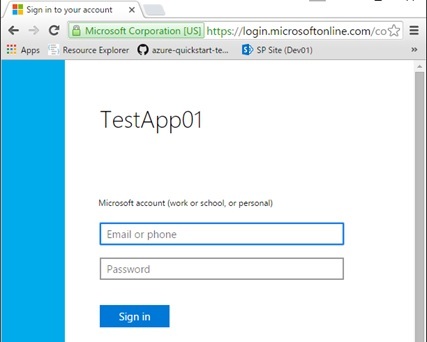
When the user logged-in, the browser will be redirected to redirect URI (here we assume https://testsite.com/testapp01). This is also the same as previous post.
However, the authorization code is not returned and the access token is directly returned instead. Furthermore, these values are not returned as query strings. The value is returned using hash (i.e, using “#”) in URI fragment as follows.
https://testsite.com/testapp01#access_token=EwCQAsl6BA...&token_type=bearer&expires_in=3600&scope=https://graph.microsoft.com/mail.readIs there any specific reason for this format ?
Yes, it’s for security reasons.
First, identity endpoint (Entra ID endpoint) will set this redirect URI string (including access token) in “Location” HTTP header. Of course, the header and body is encrypted and protected by https.
Next, the web browser will process this header. As you know, the web browser doesn’t send hash string (“#…” in URI fragment) to the server side, and it’s handled only in the client side (web browser). Hence, the access token is not sent across network, and this access token can only be used in your JavaScript application.
The following code is the sample JavaScript for login and getting access token with implicit grant flow.
When you click “Login !” button in Web page, the page is redirected and login UI is displayed. After the user logged-in, the page is redirected back to this JavaScript application and your JavaScript code extracts access token in location hash (“#…”).
<!DOCTYPE html><html><head> <meta charset="utf-8" /> <title>Test page</title></head><body> <button id="btnLog">Login !</button> <div id="txtMsg"></div> <script>(function () { if(location.hash) {var hasharr = location.hash.substr(1).split("&");hasharr.forEach(function(hashelem) { var elemarr = hashelem.split("="); if(elemarr[0] == "access_token") {document.getElementById('txtMsg').innerHTML = 'Access Token: ' + elemarr[1]; }}, this); } document.getElementById('btnLog').onclick = function() {location.href = 'https://login.microsoftonline.com/common/oauth2/v2.0/authorize?response_type=token&response_mode=fragment&client_id=2f4e4a32-e473-4925-9d89-534119ec8e9f&redirect_uri=https%3A%2F%2Ftestsite.com%2Ftest.html&scope=https%3A%2F%2Fgraph.microsoft.com%2Fmail.read'; }}()); </script></body></html>Now you get access token in your Web front-end application. You can call Microsoft Graph API by setting this token in HTTP Authorization header using XMLHttpRequest (XHR) or fetch() . (See my previous post. Microsoft Graph also supports Cross-Origin Resource Sharing (CORS).)
HTTP Flow and Programming – Advanced
In above sample, we redirected the whole page for authentication, but you can also use login popup (another browser window) and get access token.
The following sample code runs :
- Open another window (popup.html) for login
- Pop-up window (popup.html) will show login UI
- Pop-up window (popup.html) retrieves access token after logged-in
- Pop-up window (popup.html) sends access token to parent’s window (main.html)
- Pop-up window (popup.html) closes itself.
In this fashion, you can avoid the main window’s transitions. (You can keep the context in main window.)
main.html
<!DOCTYPE html><html><head> <meta charset="utf-8" /> <title>Test page</title></head><body> <button id="btnLog">Login !</button> <div id="txtMsg"></div> <script>(function () { document.getElementById('btnLog').onclick = function() {var popup = window.open('popup.html', 'oauth', 'width=500,height=400,status=no,toolbar=no,menubar=no,scrollbars=yes');popup.focus(); } window.onmessage = function(e){document.getElementById('txtMsg').innerHTML = 'Access Token: ' + e.data; }; }()); </script></body></html>popup.html
<!DOCTYPE html><html><head> <meta charset="utf-8" /> <meta http-equiv="X-UA-Compatible" content="IE=edge"> <title>Test page</title> <meta name="viewport" content="width=device-width, initial-scale=1"></head><body> <script>(function () { if(location.hash) {var hasharr = location.hash.substr(1).split("&");hasharr.forEach(function(hashelem) { var elemarr = hashelem.split('='); if(elemarr[0] == 'access_token') {window.opener.postMessage(elemarr[1], 'https://testsite.com/main.html');window.close(); }}, this); } else {location.href = 'https://login.microsoftonline.com/common/oauth2/v2.0/authorize?response_type=token&response_mode=fragment&client_id=2f4e4a32-e473-4925-9d89-534119ec8e9f&redirect_uri=https%3A%2F%2Ftestsite.com%2Fpopup.html&scope=https%3A%2F%2Fgraph.microsoft.com%2Fmail.read'; }}()); </script></body></html>As I mentioned in my previous post, access token expires in 1 hour. What can we continue using implicit grant flow ? (We cannot use refresh token in implicit grant flow.)
When the token is expired, the hidden iframe is used for renewing token in implicit grant flow.
Your application inserts an iframe which is not visible for the user, and process the above login flow in this frame. To avoid prompting login UI in this iframe, set prompt=none and login_hint={LOGIN_USER} in the requesting URL. (When your browser is logging-in with multiple users, the browser doesn’t know which user should be used for login. In this case, you can specify the user using login_hint .)
Your hidden page will be automatically login by SSO (single sign-on) experience.
Note : On the contrary, if you specify
prompt=login, the login-UI is always displayed. When you want to force user’s interaction for login, you can use this parameter value.
The following is the sample code for renewing access token.
When you click “Renew Token” button, the implicit grant flow is processed in the hidden iframe and logged-in by SSO. (The user will not see what’s happening.) After logged-in (by SSO), the access token is stored in the session storage by sessionStorage.setItem() . In this domain, your application can always get access token by sessionStorage.getItem() .
In the real production application, of course, “Renew Token” button is not needed and this process will be invoked implicitly.
test.html
<!DOCTYPE html><html><head> <meta charset="utf-8" /> <title>Test page</title></head><body> <button id="btnLog">Login !</button> <button id="btnNew">Renew Token</button> <button id="btnGet">Display Token</button> <div id="txtMsg"></div> <script>(function () { if(location.hash) {var hasharr = location.hash.substr(1).split('&');hasharr.forEach(function(hashelem) { var elemarr = hashelem.split('='); if(elemarr[0] == 'access_token') {sessionStorage.setItem('token_value', elemarr[1]); }}, this); }; document.getElementById('btnLog').onclick = function() {location.href = 'https://login.microsoftonline.com/common/oauth2/v2.0/authorize?response_type=token&response_mode=fragment&client_id=2f4e4a32-e473-4925-9d89-534119ec8e9f&redirect_uri=https%3A%2F%2Ftestsite.com%2Ftest.html&scope=https%3A%2F%2Fgraph.microsoft.com%2Fmail.read'; }; document.getElementById('btnGet').onclick = function() {var token = sessionStorage.getItem('token_value');document.getElementById('txtMsg').innerHTML = 'Access Token: ' + token; }; // renew access token using hidden iframe document.getElementById('btnNew').onclick = function() {var ifr = document.createElement('iframe');ifr.style.visibility = 'hidden';ifr.style.position = 'absolute';ifr.style.width = ifr.style.height = ifr.borderWidth = '0px'; var frame = document.getElementsByTagName('body')[0].appendChild(ifr);frame.src = 'https://login.microsoftonline.com/common/oauth2/v2.0/authorize?response_type=token&response_mode=fragment&client_id=2f4e4a32-e473-4925-9d89-534119ec8e9f&redirect_uri=https%3A%2F%2Ftestsite.com%2Ftest.html&scope=https%3A%2F%2Fgraph.microsoft.com%2Fmail.read&prompt=none&login_hint=demouser01@outlook.com'; };}()); </script></body></html>In this example, I’m setting the fixed value (fixed user) for login_hint . But, in the real production application, you can retrieve this value (login user) from preferred_username attribute in basic profile (claims) with id token. For more details about token and basic profile, I don’t explain here and see “How to verify id token in Entra ID“.
For this reason, you would have to set response_type=id_token+token and scope=openid%20profile as follows in the real production.
test.html
<!DOCTYPE html><html><head> <meta charset="utf-8" /> <title>Test page</title></head><body> <button id="btnLog">Login !</button> <button id="btnNew">Renew Token</button> <button id="btnGet">Display Token</button> <div id="txtMsg"></div> <script>(function () { if(location.hash) {var hasharr = location.hash.substr(1).split('&');hasharr.forEach(function(hashelem) { var elemarr = hashelem.split('='); if(elemarr[0] == 'access_token') {sessionStorage.setItem('token_value', elemarr[1]); }}, this); }; document.getElementById('btnLog').onclick = function() {location.href = 'https://login.microsoftonline.com/common/oauth2/v2.0/authorize?response_type=id_token+token&response_mode=fragment&client_id=2f4e4a32-e473-4925-9d89-534119ec8e9f&redirect_uri=https%3A%2F%2Ftestsite.com%2Ftest.html&scope=openid%20profile%20https%3A%2F%2Fgraph.microsoft.com%2Fmail.read&nonce=a1b2c3d4e5f'; }; . . .}()); </script></body></html>Note : For
nonce, please see “How to verify id token in Entra ID“.
As I mentioned above, the token is protected (encrypted) by https and not exposed in the network. However, if the malicious plug-in is installed in your browser, the token will be easily extracted by calling implicit grant flow.
For this reason, you should take much care for enabling implicit grant flow in your application.
Update History :
Dec 04, 2019 Update App Registration Portal (https://apps.dev.microsoft.com) to Azure Portal, because of App Registration Portal deprecation
Dec 04, 2019 Converted into English
Categories: Uncategorized
