
環境 : Visual Studio 2013 Update 2
ASP.NET Identity に関する補足
- Web API 認証 (Token 認証)
- External Login のカスタマイズ
- E-Mail Confirmation の実装
- 二要素認証の実装
こんにちは。
だいぶ間があいてしまい すみません。掲載中の ASP.NET Identity について記載します。
紹介したように、ASP.NET Identity 2.0 の新機能は「Announcing RTM of ASP.NET Identity 2.0.0」(もう、かなり昔のポストです) で紹介されています。今回は ASP.NET Identity 2.0 の新機能の 1 つである E-Mail Confirmation を紹介します。
E-Mail Confirmation とは何でしょうか ?
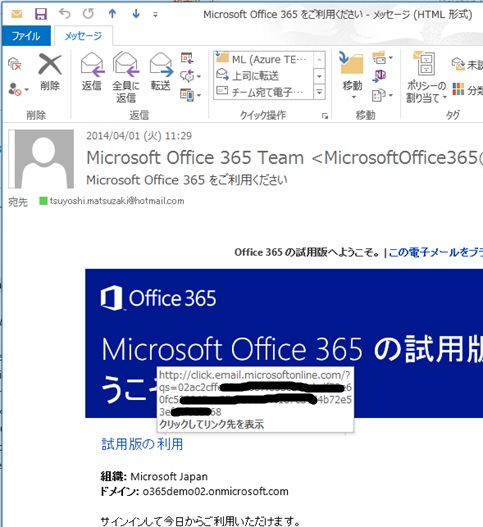
例えば、下記は、Office 365 の試用版を申し込んだ際に送られてくるメールです。[試用版の利用] というリンクに表示されている (予想不可能な) 長い文字列の URL をクリックすることで試用版の Sign Up が完了します。
予測不可能な文字列 (トークン) を発行してリンク (URL) に含めておき、その利用者から実行された操作であることを検証します。つまり、利用者が申告した E-Mail アドレスが正しく利用者により使用されている場合に限り、Sign Up (ユーザー登録) が完了します。
ASP.NET Identity 2.0 では、カスタムの Web アプリケーションに、こうした E-Mail Confirmation の機能を簡単にオプトインできるフレームワークを持っています。
準備
ASP.NET Identity 2.0 では、Microsoft.AspNet.Identity.UserManager に E-Mail Confirmation のための処理が実装されており、このクラスを使用して実装します。
しかし、その前に、メールや SMS 送信のセットアップをおこなう必要があります。
今回は、著名な SendGrid を使ったメール送信を例にサンプルを構築しますが、例えば、Twilio API を使って、SMS を使った Confirmation を実装することもできますし、ユーザーに、どちらで Confirmation をおこなうか選ばせるような応用も可能です。
では、早速準備をします。
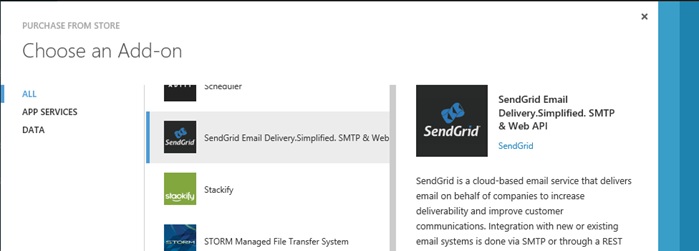
今回は、Microsoft Azure Management Portal を使い、アドオン (ADD-ONS) として SendGrid を追加します。(Store から SendGrid を選択して追加します。)
ここで紹介する基本的なサンプルの実行だけであれば無償で利用できます。
作成できたら、[接続文字列] (CONNECTION INFO) をクリックして SendGrid に接続するための Username, Password をコピーしておいてください。(このあと使用します。)
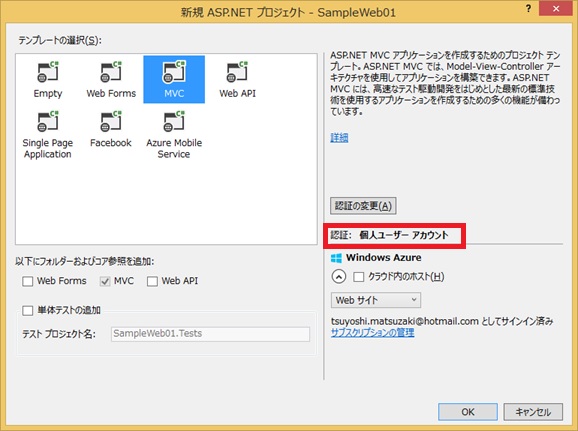
Visual Studio 2013 Update 2 以上を使って、今回は ASP.NET MVC のプロジェクトを新規作成します。
この際、認証方法として個人ユーザー アカウント (Individual User Accounts) を選択します。(下図)
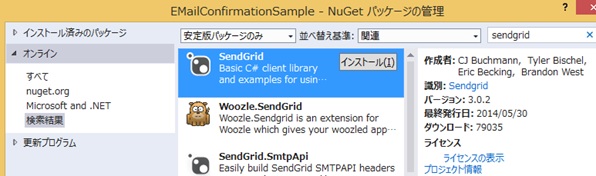
プロジェクトが作成されたら、NuGet から SendGrid のパッケージをインストールしておきましょう。(下図)
Visual Studio 2013 Update 2 の ASP.NET のプロジェクト テンプレート (ASP.NET Identity 2.0 を使用) では、既に、E-Mail Confirmation のためのコードがサンプルとして記述されています。
App_Start/IdentityConfig.cs を見ると、下記の通り記述されています。
public class ApplicationUserManager : UserManager<ApplicationUser>{ . . . public static ApplicationUserManager Create( IdentityFactoryOptions<ApplicationUserManager> options, IOwinContext context) { var manager = new ApplicationUserManager( new UserStore<ApplicationUser>( context.Get<ApplicationDbContext>())); . . . manager.EmailService = new EmailService(); manager.SmsService = new SmsService(); . . . return manager; }}public class EmailService : IIdentityMessageService{ public Task SendAsync(IdentityMessage message) { // Plug in your email service here to send an email. return Task.FromResult(0); }}public class SmsService : IIdentityMessageService{ public Task SendAsync(IdentityMessage message) { // Plug in your sms service here to send a text message. return Task.FromResult(0); }}. . .上記の通り、この既定のコードでは、E-Mail や SMS の Confirmation のためのひな形が設定されており、内部の実装は空になっています。
今回は、SendGrid を使ってメール送信をおこなうので、ここに、下記太字の通り処理を追記します。(NetworkCredential には、上記でコピーした Username, Password を設定してください。)
. . .using System.Net;using System.Net.Mail;using SendGrid;. . .public class ApplicationUserManager : UserManager<ApplicationUser>{ . . . public static ApplicationUserManager Create( IdentityFactoryOptions<ApplicationUserManager> options, IOwinContext context) { var manager = new ApplicationUserManager( new UserStore<ApplicationUser>( context.Get<ApplicationDbContext>())); . . . manager.EmailService = new EmailService(); manager.SmsService = new SmsService(); . . . return manager; }}public class EmailService : IIdentityMessageService{ public Task SendAsync(IdentityMessage message) { var sgMsg = new SendGridMessage(); // Destination is user's e-mail. sgMsg.AddTo(message.Destination); sgMsg.From = new MailAddress( "test01@azure.com", "T. Matsuzaki"); sgMsg.Subject = message.Subject; sgMsg.Text = message.Body; sgMsg.Html = message.Body; var credentials = new NetworkCredential( "test01@azure.com", // username "k94LPd..."); // password var sgWeb = new Web(credentials); return sgWeb.DeliverAsync(sgMsg); }}. . .上記で、引数 message には、メール送信に必要な送信先や本文 (Body) などの基本情報が入ってきます。(後述の通り、メール送信の際に、Subject, Body などを指定します。Destination は、ASP.NET Identity がユーザーの Mail アドレスを設定します。)
以上で E-Mail Confirmation を実装するための準備は完了です。
E-Mail Confirmation のプログラミング
では、Microsoft.AspNet.Identity.UserManager を使用して E-Mail Confirmation の処理を実装します。
以下の流れで実装します。
- UserManager.GenerateEmailConfirmationToken を呼び出して token を生成します
- UserManager.SendEmail (SMS の場合は UserManager.SendSms) を呼び出して、リンク情報を含んだ E-Mail のメッセージを送信します。
- ユーザーが確認メールのリンクをクリックします。アプリケーションでは、クリックされた処理 (アクション) として、UserManager.ConfirmEmail を呼び出してトークンの確認をおこないます。
トークンが正しければ、E-Mail Confirmation は完了です。 - ユーザーが E-Mail Confirmation を完了したか否かは、UserManager.IsEmailConfirmed で確認できます。(上記の UserManager.ConfirmEmail が実行されて完了すると、UserManager.IsEmailConfirmed が True になります。)
この IsEmailConfirmed メソッドを使ってカスタムな処理を実装します。(例えば、E-Mail Confirmation が完了するまで特定の処理をブロックする、など)
では、実際にサンプルを構築してみましょう。
今回は、よくある処理として、ユーザーの登録 (Register, SignUp) の際に、Confirmation E-Mail を送信し、このメールを受け取ったユーザーのみがログインできるように処理してみます。
まず、ControllersAccountController.cs を開き、Register メソッドに、下記太字の処理を記述します。(Visual Studio 2013 Update 2 のプロジェクト テンプレートでは、これと同じ処理がコメントアウトされているので、コメントアウトを外すだけです。)
public async Task<ActionResult> Register(RegisterViewModel model){ if (ModelState.IsValid) { var user = new ApplicationUser() { UserName = model.Email, Email = model.Email }; IdentityResult result = await UserManager.CreateAsync( user, model.Password); if (result.Succeeded) { await SignInAsync(user, isPersistent: false); string code = await UserManager.GenerateEmailConfirmationTokenAsync(user.Id); var callbackUrl = Url.Action( "ConfirmEmail", "Account", new { userId = user.Id, code = code }, protocol: Request.Url.Scheme); await UserManager.SendEmailAsync( user.Id, "アカウントの確認", "このリンクをクリックしてください <a href="" + callbackUrl + "">こちら</a>"); return RedirectToAction("Index", "Home"); } else { AddErrors(result); } } return View(model);}上記では、UserManager.GenerateEmailConfirmationToken で token 文字列を生成し、生成された token 文字列を引数 (query string) とする URL を作成して、UserManager.SendEmail で Confirmation E-Mail を送信しています。(この際、リンクされて戻ってくる URL は、MVC の Account/ConfirmEmail アクションです。)
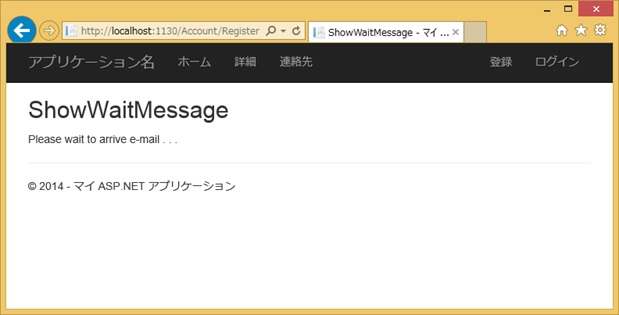
なお、上記のサンプル コードでは、E-Mail 送信後に、普通にログインがおこなわれてホーム (Home/Index) に戻ってきますが、例えば、「Please wait to arrive e-mail . . .」などのメッセージを表示して、E-Mail Confirmation が完了するまでログインを reject したいなら以下の通り実装します。
まず、以下の通りログインをおこなわずに E-Mail 送信だけをおこない、メッセージ画面を表示します。(太字の部分を変更しました。)
public async Task<ActionResult> Register(RegisterViewModel model){ if (ModelState.IsValid) { var user = new ApplicationUser() { UserName = model.Email, Email = model.Email }; IdentityResult result = await UserManager.CreateAsync(user, model.Password); if (result.Succeeded) { //await SignInAsync(user, isPersistent: false); string code = await UserManager.GenerateEmailConfirmationTokenAsync(user.Id); var callbackUrl = Url.Action( "ConfirmEmail", "Account", new { userId = user.Id, code = code }, protocol: Request.Url.Scheme); await UserManager.SendEmailAsync( user.Id, "アカウントの確認", "このリンクをクリックしてください <a href="" + callbackUrl + "">こちら</a>"); //return RedirectToAction("Index", "Home"); return View("ShowWaitMessage"); } else { AddErrors(result); } } // ここで問題が発生した場合はフォームを再表示します return View(model);}E-Mail Confirmation が完了するまで Login を reject する場合は、ControllersAccountController.cs の Login アクションに下記 (太字) の通り実装すると良いでしょう。
public async Task<ActionResult> Login(LoginViewModel model, string returnUrl){ if (ModelState.IsValid) { var user = await UserManager.FindAsync(model.Email, model.Password); if (user != null) { if (!await UserManager.IsEmailConfirmedAsync(user.Id)) { ModelState.AddModelError("", "E-Mail Confirmation is needed !"); return View(model); } await SignInAsync(user, model.RememberMe); return RedirectToLocal(returnUrl); } else { ModelState.AddModelError("", "ユーザー名またはパスワードが無効です。"); } } return View(model);}Visual Studio 2013 Update 2 の既定のプロジェクト テンプレートでは、この E-Mail Confirmation を使って、Password を忘れた場合の Reset 処理も実装されています。
Password Reset で E-Mail Confirmation を使用する際は、下記 (太字) のコメントアウトを外します。(コードの詳細は省略します。)
public async Task<ActionResult> ForgotPassword(ForgotPasswordViewModel model){ if (ModelState.IsValid) { var user = await UserManager.FindByNameAsync(model.Email); if (user == null || !(await UserManager.IsEmailConfirmedAsync(user.Id))) { ModelState.AddModelError("", "ユーザーが存在しないか、確認されていません。"); return View(); } // アカウント確認とパスワード リセットを有効にする方法の詳細については、http://go.microsoft.com/fwlink/?LinkID=320771 を参照してください // このリンクを含む電子メールを送信します // string code = await UserManager.GeneratePasswordResetTokenAsync(user.Id); // var callbackUrl = Url.Action("ResetPassword", "Account", new { userId = user.Id, code = code }, protocol: Request.Url.Scheme); // await UserManager.SendEmailAsync(user.Id, "パスワード", "のリセット <a href="" + callbackUrl + "">こちら</a> をクリックして、パスワードをリセットしてください"); // return RedirectToAction("ForgotPasswordConfirmation", "Account"); } // ここで問題が発生した場合はフォームを再表示します return View(model);}つぎに、Account/ConfirmEmail 側で受け取った token の検証処理を実装します。
実は、Visual Studio 2013 Update 2 のプロジェクト テンプレートでは、この処理もすでに実装されています。ControllersAccountController.cs には、既に以下のアクションが実装されています。(コードをいっさい変更する必要はありません。)
public async Task<ActionResult> ConfirmEmail(string userId, string code){ if (userId == null || code == null) { return View("Error"); } IdentityResult result = await UserManager.ConfirmEmailAsync(userId, code); if (result.Succeeded) { return View("ConfirmEmail"); } else { AddErrors(result); return View(); }}
動作確認
では、上記の Web アプリケーションにアクセスしてみましょう。
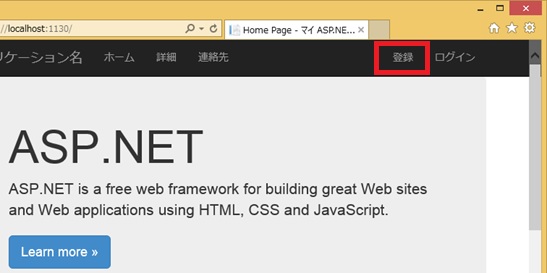
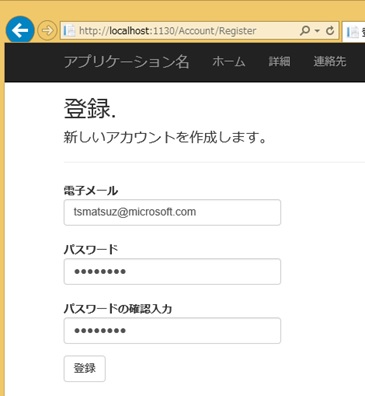
まず、画面上部の [登録] (Register) のリンクをクリックして、User の登録をおこないます。
なお、下記で入力する電子メールのアドレスにメールが飛びますので、ユーザー登録の際は、実際に使用しているメール アドレスを設定してください。
登録が完了すると、上記の ShowWaitMessage の View が表示されます。(下図のような確認画面と仮定します。)
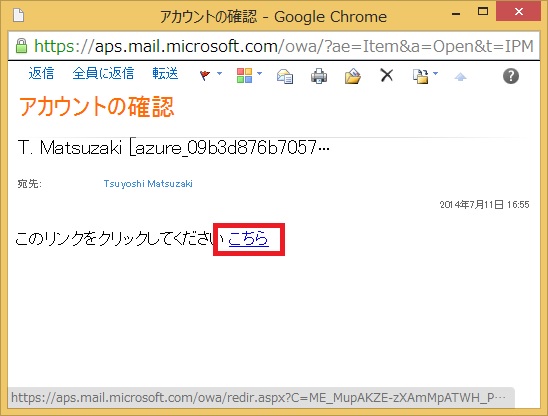
また、設定したメールアドレスに、下図の通り、リンクの設定されたメールが飛んできます。
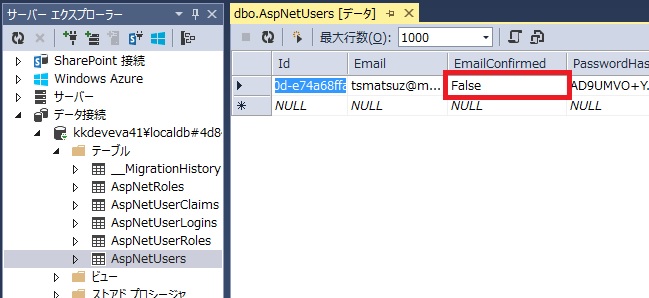
ここで、この ASP.NET Identity が使用しているデータベースにアクセスして確認してみてください。(localhost でデバッグ実行している場合には、(LocalDB)v11.0 に接続してください。)
下図の通り、AspNetUsers テーブルの EmailConfirmed が False になっているのが確認できます。
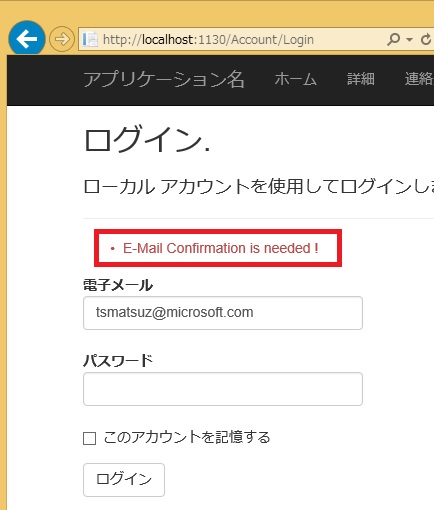
上述の通り、UserManager.IsEmailConfirmedAsync を使った Login アクションのカスタマイズをおこなっている場合、ブラウザーからログインすると、下図の通り、reject 画面 (エラー画面) が表示されるのが確認できます。
上図のメールでリンクをクリックすると、E-Mail Confirmation が完了します。
そして、今度はログインが可能になるはずです。
最新の Visual Studio を使用すると、こうしたネットワークを利用した高度が実装も容易ですので、是非お試しください。
次回は、Twilio API を使って、ASP.NET Identity に二要素認証 (多要素認証) を実装してみましょう。
Categories: Uncategorized

3 replies»